
Presentation of PowerPoint:-
Any professional can gain from knowing how to make a superb PowerPoint presentation. The issue? It’s quite simple to make a mistake. A lousy PowerPoint presentation may take away
from the excellent material you’re providing to team stakeholders due to poor color choices or incorrect slides.
For this reason, it’s crucial to understand how to build a PowerPoint presentation from scratch, beginning with your slides. Even if you are familiar with PowerPoint, a refresher will help
you create a more appealing, professional slideshow. Let’s get going.
- Making a PowerPoint Presentation,
- Making a Presentation,
- PowerPoint Design Microsoft PowerPoint is what I like to think of as a test of fundamental business abilities. I need to exhibit design expertise, technological literacy, and a sense of personal style to produce a passable presentation. I’ve probably failed the test if the presentation contains errors (such as an unexpected typeface, a broken link, or incomprehensible text). A poor visual experience can make my well-rehearsed spoken presentation unappealing to the audience. Without a strong PowerPoint presentation to support it, expertise is meaningless. Start by downloading your free PowerPoint templates from the list below.
Whatever the subject, mastering PowerPoint’s design tools, paying attention to presentation procedures, and adhering to a consistent style are the three major requirements for
producing great PowerPoints. Here are a few straightforward suggestions to get you started mastering each of those elements. Don’t forget to also look at the supplementary resources
listed at the end of this post.
How to Make a PowerPoint Presentation
Since a presentation is made up of several slides, let’s explore PowerPoint’s features in more detail.
Getting Started
1. Open PowerPoint and click ‘New.’
If a page with templates doesn’t open by itself, click New in the top left corner of your screen. To open an existing presentation that you’ve already produced, choose Open and double-click the icon.

2. Choose a theme or create your own.
Microsoft delivers pre-installed themes and color schemes to assist you in creating your presentations with a uniform look. Choose the File tab once more, select New, pick one of the options, and then click Create to select one of these pre-built themes. If you’d prefer not to add one, you may also choose a blank presentation.
Otherwise, you can create your own “theme” using PowerPoint features, your sense of design, and the color scheme of your company.

Creating PowerPoint Slides
3. Publish a slide.
By selecting the Home tab, followed by the New Slide option, you can add a new slide. Consider the headline, text, and imagery you want to include on the slide.
Consider the headline, text, and imagery you want to include on the slide.

4. Produce numerous slides for various uses.
Presenting the same presentation with a different material is not what you want to accomplish. This would be tedious to your audience. Make careful to design several variations that address some of the typical applications for presentations. To start, you’ll require:
- An opening slide
- A slide with the agenda or the contents
- A slide that introduces the speaker; • Several content slides (design several layouts while taking into account the type of multimedia you’ll use);

5. Use the Duplicate Slides feature to save you time.
There is no justification for continuing to produce these designs. You can easily replicate them before entering your content now that you have a few to choose from. This is how to accomplish it:
- Right-click the thumbnail of the slide you want to replicate in the left pane.
- Duplicate Slide can be selected from the pop-up menu.
By doing this, a duplicate of this slide will be immediately added to the presentation. From there, you can adjust it to suit your requirements.
6. Add photos to your slide
By selecting Insert and the Pictures icon, you can add images. The Home and Insert tabs on the top ribbon’s features allow you to add more items. Drag items around the arrangement using your mouse to experiment.
7. You can (optionally) add transitions to your slides.
When used well, transitions can give your presentation a little bit of motion and showmanship. You can choose from a variety of built-in transitions in PowerPoint.
Select the Transitions tab from the top ribbon to gain access to them. You can then choose a transition for it to preview on your screen after that. Click Effect Options and fiddle with the features until you discover anything you like to further personalize it. Select Transitions and click None to get rid of a transition

8. You can (optionally) add animations to your presentations.
Animations, like transitions, can create motion, disclose details, and support you in emphasizing the points you want to make during your speech. The steps below can be used to animate an element:
• Click on the element you wish to be animated to select it.
• From the top ribbon, select Animations.
• The ribbon will display a variety of effects for you to pick from.
• A preview is available when you click on one.
• Choose Effect Options to alter the animation.
• Click None in the ribbon to get rid of an animation.
The following are some of the options for customizing animations: On Click, With Previous, After Previous, Duration, and Delay.
Play around with them until you find an effect that you like since they explain how you want the effect to behave.
Additionally, you have the choice to reorder the animations in the list that appear after clicking the Animation Pane button when editing your slides.
Finishing Up Your Presentation
9. Save your presentation.
Select the folder or location where you want your PowerPoint to be stored by clicking File and Saving. It might be advantageous to turn your presentation into an online course if you use your slides for instruction or teaching.
10. Run your presentation.
Always perform a test run to make sure your slides are properly set up and your animations function as you expect them to.
To present your PowerPoint, select the Slide Show tab and then click Play from Start. The slide will fill your screen, hiding your desktop and PowerPoint application. This keeps the attention of your audience—in this case, you—exclusively on the presentation’s visual components.
11. Advance the slides.
Click your mouse in presentation mode when you’re finished with one slide and wish to show the following in your sequence. This will make the slide advance.
Tips for PowerPoint Presentations
1. You should never let PowerPoint tell you how to use it. Make your slide sizes.
2. Edit the design of your slide template.
3. Always keep your reader in mind when writing.
4. Verify that each of your objects is correctly aligned.
5. Make use of “Format Object” to have more control over the designs of your products.
6. Make use of the shapes in PowerPoint.
7. Design unique shapes.
8. Crop photos into specific shapes.
9. Use PowerPoint to display websites.
10. Examine GIFs.
11. Maintain simplicity.
12. Include the font files.
13. Make JPEG copies of your slides.
14. Include multimedia.
15. Take your equipment.
16. Use “Presenter View”.
PowerPoint Style
1. Don’t let PowerPoint decide how you use PowerPoint.
Microsoft intended to offer users of PowerPoint a variety of features. However, this does not imply that you must apply each one. Observe the following warning signs:
• Before using the current PPT themes, make sure they meet your requirements.
• Try to avoid using the Calibri and Cambria typefaces that come standard with Microsoft Office. The presentation may come off as unimpressive when using these two types.
• PPT’s action sounds should never be used by professionals. (Put your audience’s needs above your preferences.
• Bulleting in PowerPoint is automatic, but consider these questions: Do you need to use bullets for what you need to do? They’re not always, but sometimes they are.
• All forms in recent PPT settings have a slight shadow. If this shadow is not genuinely required, remove it.
2. Create custom slide sizes.
For the majority of presentations, you can typically get away with the default slide size, but you might need to change it for larger presentations on oddly sized displays. Here’s how to accomplish it if you need to.
• Click File in the top-left corner.
• Click on Page Setup.
• Enter the desired background’s height and width, then click OK.
A dialog window will show up. If you want to resize your content as well, click Scale; otherwise, click Don’t Scale. We advise selecting Don’t Scale, followed by manual correction of minor layout flaws.
Resize your slides before you add any items to them to save headaches in the final phase. Otherwise, your objects’ dimensions will start to skew.

Edit the design of your slide template.
Often, it’s far simpler to make changes to your PowerPoint template before you begin; this way, you may avoid having to manually design each presentation. Here’s how to accomplish that.
• From the top navigation, choose View.
• Master Click.
• Click Slide Master from the drop-down menu.
• After making your desired modifications, click Close Master in the top ribbon. That template will be applied to all upcoming and existing slides in that presentation.
4. Always keep your reader in mind when writing.
Text makes up a sizable portion of a PowerPoint’s content. Examining your written work from a variety of perspectives might help you come off as more convincing. Great text can make or break your presentation. Limit the amount of text to 6–8 lines (or 30 words) minimum, with a 24-point font size. Presenters that think about how their text will be received stand out from the rest.
Typography:
Many people undervalue the power of typography, yet picking the appropriate font is crucial since it can affect how your audience perceives you. Choosing the proper font gives you the chance to present your brand’s professionalism and individuality consistently.
Even if certain typefaces have a polished, businesslike appearance, that doesn’t make them uninteresting. Thinking your font isn’t “exciting” enough is a typical mistake that could cause you to pick a typeface that detracts from your overall message. We advise keeping with straightforward serif and sans-serif fonts. Avoid using script typefaces because they could make text harder to read.
However, you can still utilize whimsical and oddball fonts sparingly. A presentation might become more interesting by contrasting a playful font or bold letters with something more formal.
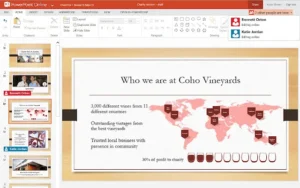
Above all, make sure you’re consistent so each slide of your presentation looks the same. Your audience won’t be distracted by too many different typefaces this way. Take a look at this illustration from the HubSpot corporate profile templates:
5. Verify that each of your objects is correctly aligned.
Your slide will look professional and polished if the objects are positioned correctly. You can manually attempt to align the images, but we all know how frequently that fails. Though you move each object to the center of the slide in an attempt to make it hang out there, it still doesn’t look completely right. With this method, you may put an end to your guessing game and let PowerPoint do its magic.
Here’s how you line up several things at once:
• Click on each object while holding down Shift to select them all.
• Select Align or Distribute after selecting Arrange in the top choices bar.
• Decide on the alignment type you want.
How to align things with the slide is as follows:
• Click on each object while holding down Shift to select them all.
• Select Align or Distribute after selecting Arrange in the top choices bar.
• Decide to slide alignment.
• Once more click Arrange from the top options bar, then select Align or Distribute.
• Decide on the alignment type you want.
PowerPoint Design
6. To have more control over the designs of your items, use “Format Object”.
You may make minute tweaks that would otherwise seem impossible using the format choices. To do this, right-click an item and choose Format item from the menu that appears. You can alter the size of shapes, generate reflections, and many other things here. The menu that appears after that is as follows:
Although PowerPoint’s format toolbars include the majority of the choices, the format window menu offers complete control. Additional examples of the possibilities offered are:
- Modifying text within a form.
- Making a shadow appear naturally from a perspective behind an object.
- Manual and automatic photo recoloring choices.
7. Make use of the shapes in PowerPoint.
Many users are unaware of the versatility of PowerPoint’s shape tools. The potential for effective design with shapes is easily accessible when combined with the enhanced format options made available by Microsoft. Beyond the conventional rectangle, oval, and rounded rectangle patterns, PowerPoint offers the user a ton of fantastic form alternatives.
Today’s shapes come with an extremely useful Smart Shapes feature that makes it easy to quickly design flowcharts and diagrams. Given that PowerPoint is a visual medium, these tools are very useful. Use shapes instead of tedious paragraphs and bullet points to make your point more obvious.

8. Create custom shapes.
Right-click the shape you just made and select Edit Points. You can design unique forms that meet your requirements by adjusting points. For instance, arrows can be reshaped to meet the desired proportions.
A different choice is to mix two shapes. Click Shape Format in the top ribbon after choosing the two shapes you want to deal with. Touch Merge Shapes.
You’ll see several choices.
• Combining the two previous shapes’ overlapped cutout areas yields a new custom shape.
• Union results in a single, combined shape.
• Intersect creates a shape using only the portions of the two preceding shapes that overlap.
The overlapped area of one shape is removed from the other by subtracting.
• Depending on where they intersect, Fragments will divide your form into various pieces.
Instead of attempting to precisely edit points, use these tools to generate precisely measured bespoke forms.

9. crop pictures into specific forms.
You can clip existing photos into new forms in your presentation using PowerPoint in addition to creating bespoke shapes. Here is how to go about it:
• Click the image and choose Picture Format from the menu that appears.
• Select Crop, Crop to Shape, and then the shape you want. Ta-da! customized photo shapes.

10. Display webpages inside of PowerPoint.
According to custom, you should simply link to the page and instruct a browser to open it if you wish to display a website in a PowerPoint presentation. There is a better choice available to PC users.
You can include a website using a standard HTML iframe directly into your PowerPoint presentation using third-party software that completely connects with PowerPoint’s developer tab. The third-party software LiveWeb, which you may put on your PowerPoint application, is among the best utilities.
Your PowerPoint presentation won’t need to be interrupted if you use LiveWeb; it will continue to flow naturally. This can be a top-notch improvement from a third party whether you embed an entire webpage or just a YouTube video. Simply go to the LiveWeb website and follow the instructions to install the add-on.
Unfortunately, Mac users lack a comparable choice. Alternatively, you can download media (like a YouTube movie) and then embed it by linking to it in a browser or taking screenshots of the page.
11. Examine GIFs.
GIFs are looped animated images that can be used to convey a mood, an idea, knowledge, and much more. GIFs are frequently added to PowerPoint presentations to inject humor or swiftly demonstrate a procedure. GIFs are simple to include in your slides. Simply take the steps that follow to do so:
• Save the desired GIF by downloading it.
• Select the slide that the GIF should be on.
• Select Insert or Picture under the Home tab.
• Select Picture from File from the Picture drop-down menu.
• Select your GIF by navigating to where you saved it. Select Insert next.
• As soon as you insert it, it will begin to play automatically.
12. PowerPoint Process
PowerPoint is a great tool for adding visual data, graphics, and extra points to your presentation. This indicates that your presentation shouldn’t be entirely composed of your PowerPoint. No matter how artistic and lovely they are, your slides shouldn’t take center stage. Use only the language and images that are necessary to support the clarity and authority of your message.
Your audience will be distracted and you are much more likely to lose their attention if your slides are cluttered and thick with information. Nothing should be unnecessary in your slides! Keep your presentation tidy to make it more persuasive. Several methods exist for doing this:
• Keep text and bullets to the minimum.
• Keep quotes short and avoid paragraphs.
• Preserve “negative space” or “white space.”
• Keep percentages, graphs, and data super basic.
13. Embed your font files.
When presenters switch from one machine to another, the typefaces in PowerPoint frequently appear to shift. The presenter machine just doesn’t have the same font files installed, thus the fonts aren’t changing. There is a simple fix for this problem if you’re utilizing a PC and giving your presentation on a PC.
The trick is this: Only on a PC, save your PowerPoint file by selecting File, Options, and then clicking the Save option. Then, under Preserve Fidelity when sharing this presentation, click the box for Embed fonts in the file. Now, when you switch computers, your presentation will preserve the font file and your fonts won’t change.
A similar feature is available in the macOS PowerPoint version. On a Mac, carry out the following to embed your fonts:
• Start the presentation.
• Select PowerPoint from the top bar, then select Preferences.
• Click Save under Output and Sharing.
• Click Embed fonts in the file under Font Embedding.
14. For backup purposes, save your slides as a PDF file.
Create a PDF version of your presentation just in case, you’re still worried that it won’t look the same when it’s time to present. If you’re going to be presenting on a different computer, this is a smart choice. You can also utilize the system viewer to access the PDF if the presenting machine doesn’t already have PowerPoint installed. You’ll never experience issues with this file type on any laptop.
Your GIFs, animations, and transitions won’t carry over, which is the one drawback. However, this should be OK since the PDF will just serve as a backup and not as your main copy.
Follow these procedures to save your presentation as a PDF file:
- Select File, then select Save As.
- To open the File Format window, click File.
- You’ll see a drop-down menu. Choose PDF.
- Choose Export.
You can also choose PDF from the file format selection by clicking File, then Export.
15. Include multimedia.
With PowerPoint, you can either embed the media into your presentation or link to it from outside. Even though you should try to embed these files, using a Mac will prevent you from doing so (see the notice below). The following are two excellent benefits of embedding for PCs:
- You can play media immediately in your presentation when you embed. The appearance will be much more polished than flipping between windows.
- Because the file is embedded into the PowerPoint presentation, it should play without any additional effort (unless on a Mac).
Note: Using multimedia files in PowerPoint on a Mac requires particular caution.
You must always carry the video and/or audio file in the same folder as the PowerPoint presentation if you use PowerPoint for Mac. The presentation and the folder it contains should be saved on a portable drive in its permanent folder before adding any audio or video materials. Also, Mac users must ensure that their multimedia files are in WMV format if the presentation will be viewed on a Windows computer. If you want to utilize PowerPoint properly, think about using the same operating system for both developing and presenting, no matter what. This tip can be a little complicated.
16. Bring your hardware, please.
PowerPoint is still a little jittery when switching between operating systems. Things can change even across different PPT versions. Making sure you have the appropriate hardware is one approach to solving these issues, so when you’re presenting, just bring your laptop with you.
Upload your PowerPoint presentation onto Google Slides as a backup alternative if you’re extremely concerned about the various systems you might need to use. A cloud-based presentation tool called Google Slides will appear the same on all operating systems. The only things you require are a browser and an internet connection.
Follow these procedures to import your PowerPoint presentation into Google Slides:
Visit slides.google.com by going there. Make sure a Google account, preferably your own, is signed in.
- Click the plus-sign-indicated empty box under “Start a new presentation.” This will start an empty presentation.
- Select Import slides under File.
- You’ll see a dialog box appear. Click Select a file from your device after tapping Upload.
- Click Open after selecting your presentation.
- Decide which slides you want to import. Click All in the dialog box’s upper right corner if you wish to import all of them.
- Select Slides for import.
17. Use Presenter View, please.
Both a presenter’s screen and the main projected display for your presentation will often be present during a presentation. In the Slide Show tab of PowerPoint, there is a fantastic feature called Presenter View. The Presenter View features a note-taking space, a timer/clock, and a presentation display.
This tool can assist many presenters in tying their visual aids and spoken talks together. Never give the impression that you are reading from a stack of notes while presenting on a PowerPoint. To help you make a presentation that feels more natural, use the Presenter View option.
Pro tip: To make the cursor disappear at the beginning of the presentation, use CTRL + H. If you need it, simply press the “A” key to restore it!
Start here to create your next stellar PowerPoint presentation.
You can use PowerPoint for a lot more than just client presentations once you have the style, design, and presenting processes down. Slide programs like PowerPoint are useful resources that shouldn’t be overlooked. You can create presentations that wow your audience by using a fantastic template.
Frequent Ask Question for PowerPoint
What are PowerPoint presentation tips?
PowerPoint presentation tips are strategies and guidelines that help you create more engaging and effective slideshows using Microsoft PowerPoint or similar presentation software.
How can I make my PowerPoint presentations more innovative?
You can make your PowerPoint presentations more innovative by incorporating creative design elements, interactive features, storytelling techniques, and multimedia elements.
What are some general tips for creating innovative PowerPoint slideshows?
Some general tips include using visuals, keeping slides simple, telling a compelling story, and using innovative design templates.
Can you provide examples of innovative design templates for PowerPoint?
Innovative design templates may include modern, minimalist, or themed templates that align with your presentation's message. They can incorporate unique color schemes, fonts, and graphics.
How can I choose the right template for my presentation?
To choose the right template, consider your audience, topic, and the mood you want to convey. Experiment with different templates until you find one that suits your content.
Is it necessary to use templates for innovative presentations?
No, templates are not necessary, but they can save you time and provide a consistent design framework for your presentation. You can also create innovative presentations from scratch.
What are some tips for using visuals effectively in PowerPoint presentations?
Use high-quality images, charts, graphs, and infographics to convey information visually. Ensure visuals enhance your message rather than cluttering slides.
How can I keep my slides simple and avoid information overload?
Limit the amount of text on each slide, use bullet points, and focus on key messages. Use visuals to complement the text and break up content.
What is the role of storytelling in innovative presentations?
Storytelling helps engage your audience and make your presentation memorable. Craft a narrative that connects with your content and audience's emotions.
Are there any interactive features I can use in PowerPoint for innovation?
Yes, you can use features like hyperlinks, animations, transitions, and interactive buttons to engage your audience and make your presentation more dynamic.
Pingback: At the age of 82, Michael Gambon, who portrayed Dumbledore in "Harry Potter," passed away. - Web Global IT Services & Solutions
Pingback: Live updates on the Karnataka Bandh: In Bangalore, a holiday has been proclaimed for all schools and colleges. - Web Global IT Services & Solutions
Pingback: Chandramukhi 2 Box Office Collection: Kangana Ranaut Starrer Earns ₹7.50 Cr. On Day-1 - Web Global IT Services & Solutions
Pingback: On the Passing of U.S. Senator Dianne Feinstein (2023),Governor Newsom - Web Global IT Services & Solutions
Pingback: Veterans' injuries affect the Bears secondary I injury best update 2023 - Web Global IT Services & Solutions
Pingback: The Delhi High Court awards a man who was unjustly imprisoned for 30 minutes 50,000 rupees in compensation. - Web Global IT Services & Solutions
Pingback: In the US, a FedEx plane crashes and skids off the Runway 2023 - Web Global IT Services & Solutions
Pingback: Geno Smith, the Seahawks' quarterback, played despite having a knee injury in Monday night's victory over the Giants 2023 - Web Global IT Services & Solutions